
Oh, for the love of ice cream… Ice cream seems to be one of those desserts that just brings out the best in cream. It shines alone without any help of other flavorful ingredients, unless you’re a fan of having more flavoring in your ice cream than the vanilla base itself! Lol. In today’s recipe, however, we’re going to take a little veer away from a traditional homemade ice cream, because we’re going to add some eggs!
Jump to RecipeCall me a purist, but I am probably one of those who enjoys the more simple, vanilla base with toppings swirled or sprinkled through it rather than the other way around. However, if I had to choose between vanilla butter pecan or coffee-flavored ice cream, it might be a toss up! But, this post isn’t about me… For the sake of sharing that pint we’re making here, I think going the simple plain route is best. I’ll share “add ons” (and a couple “add ins”) below that you can put in your vanilla base so that you and your partner can customize your own ice cream.
Besides, there are actually some challenges to making ice cream with some flavored “add ins” that include bits of fruit or some of those keto fat bombs you love. These pitfalls often have more to do with how these items freeze than anything else. So, it isn’t that these options cannot be overcome, but it’s better to know how to prepare or add in some of these items before you bite into your ice cream and realize you almost broke a tooth. 🙂
Okay, so today we’re going to explore dairy-free ice cream, using egg yolks (and a couple nut milks). If you’ve already experimented with different recipes for making homemade ice cream (without egg yolks), it doesn’t take long to notice how the ice cream tends to have more of an icy quality to it. Or, did you notice how quickly it melted in your bowl? (My husband flat out prefers homemade ice cream right after its been made, rather than the stuff that’s often frozen hard as a rock the next day.) Utilizing the fat contained in egg yolks will make your ice cream become thick and cold much faster than doing without, reducing the chance of more of those ice crystals from forming.
Tip: The quicker you empty out your freezer bowl of ice cream and store it in the freezer, the better your ice cream will be the next day. It will help minimize those ice crystals from forming.
Store-bought ice cream includes stabilizers and emulsifiers to do the job of keeping some of those ice crystals from forming, as well as increasing the shelf life of the ice cream. But, we don’t want to add those things in our ice cream, at least not a lot of them, do we? Actually, if we’re adding a common coconut or almond milk from a carton, we’re likely to be adding some of these stabilizers in the form of locust bean gum.
Common stabilizers to reduce ice formation in commercial or store-bought ice cream include: guar gum, carob bean gum, locust bean gum, and cellulose gum. And, the typical synthetic emulsifiers used to keep these ice creams from shrinking during shipment and melting when eaten are: mono- and diglycerides, polysorbate 80 and glycerol monooleate, as found seen in a technical article entitled “Ice Cream Science“. Another additive fairly common in ice cream and used as an emulsifier, thickening agent, or preservative is carrageenan. Some evidence suggests it leads to inflammation so this is another additive you may consider watching out for.
Yet, natural emulsifiers on the other hand, include egg yolks and cream buttermilk. Yes, we like natural over synthetic, and we’re using yolks in this recipe! Okay, I think we’re ready to begin making some dairy-free ice cream! Are you ready?
If you make this, please consider tagging me on Instagram, sharing a photo on Pinterest, or leave your comments below. I’d love to know how it turned out!
Note: This recipe is essentially very similar to making a custard, other than you’re adding about 3/4 more nut milk. And, if you’ve never made custard, this version of homemade ice cream often takes twice as long because you have two additional steps: 1.) cooking those eggs by means of heating up your coconut milk (or using a double boiler with the egg and coconut milk mixture) and 2.) throwing the warm custard mix into an ice bath prior to putting it in your ice cream maker, or consider storing the mix in your refrigerator for an hour or even overnight. I tend to do the latter, and our ice cream finishes in 20 minutes tops!
Dairy-Free Ice Cream
4
1/2 cup servings273
kcal120
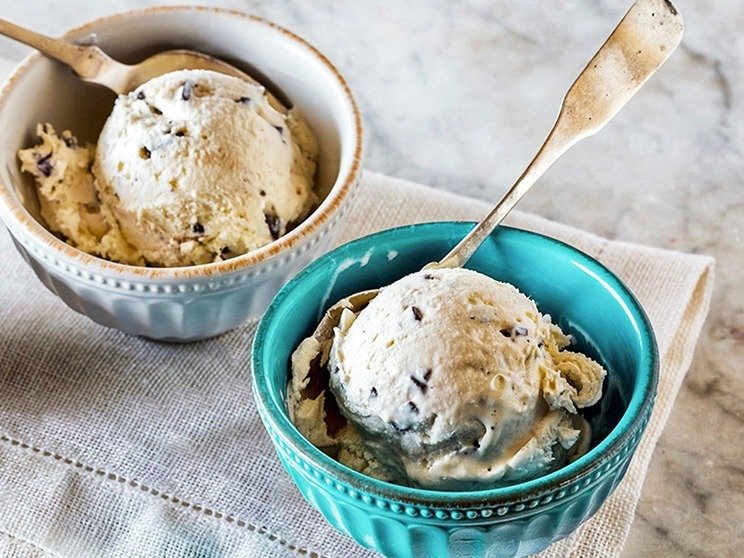
minutesMake a thick, rich and creamy dairy-free ice cream, using egg yolks, for your next evening dessert. Not only will a lactose intolerant belly thank you for it, but you may actually really enjoy it yourself!
Macros, using the above ingredients with 3/4 cup almond milk, per 1/2 cup serving: 2.8g net carbs | 5.3g protein | 25.3g fat
Ingredients
6 pasture-raised egg yolks
13.5 – 15 can can full-fat coconut milk (the more fat the better)
3 tablespoons erythritol or monk fruit blend sweetener
2 teaspoons vanilla extract, more may be added when adding more than 3/4 cup milk alternative as listed below
3/4 – 1 cups (unsweetened vanilla-flavored) almond or other milk alternative, depending on your preference for taste
4 packets powdered stevia or Stevita sweetener
- Supplies You’ll Need
1 ice cream maker, minimum 1.5QT should be sufficient unless you’re making ice cream for a larger family–I use this Cuisinart 2QT.
1 ice cream container for storing any leftover ice cream
1 small mixing bowl for your yolks, which you will add your hot coconut milk mixture to later
1 large mixing bowl or other wider bowl to create an ice bath
1 medium fine mesh colander for straining your custard/ice cream mix
1 small to medium saucepan for cooking the coconut milk, depending on how much you are making
1 wire whisk
1 wooden spoon
- Options for “Add-On” Toppings or “Add Ins” to Your Ice Cream Mix While Churning
1/2 teaspoon instant freeze-dried coffee add on to mix into my ice cream bowl or cup–I like using a decaf, Swiss water-processed coffee such as the Mount Hagen brand (the Swiss-water process doesn’t use chemicals to remove the caffeine from the beans)–0g net carbs
1 teaspoon peanut butter oil add on, you know that stuff that sits at the top of the jar–It makes a great peanut butter-flavored syrup; it just adds fat, not carbs!
1/8 cup Lily’s sugar-free dark chocolate chips, chopped, add on–2g net carbs; 2g protein; and 9.1g fat per 1/8 cup used–Chocolate chips (or chunks) are one of those add ins that may require alternative prep in making so it does not become rock hard when frozen inside the ice cream. But if you eat all your ice cream the day you make it, you won’t have to worry about that!
1/8-1/4 cup unsweetened coconut flakes to add into your ice cream, as it’s churning–It’ll give the coconut flakes a firm chewy texture when frozen–1g net carb; 1g protein; and 9.5g fat per 1/8 cup used for every four servings
1/8-1/4 cup chopped almonds, or these can be sprinkled over your ice cream as a add on–1g net carbs; 3g protein; and 7.5g fat per 1/8 cup that you’ll divide by 4 (servings)
Directions
- In a medium-sized mixing bowl, add your egg yolks and sweeteners, and then whisk until you get a thick consistency. When done, set aside.
- In a small to medium-sized saucepan, heat up the can of shaken coconut milk and vanilla extract on medium low heat. Turn off the heat just before it begins to boil. This will melt any larger coconut chunks that were in the can previously.
- Then, slowly pour in half your hot coconut milk into the egg yolk mixture, making sure you continually whisk the mixture together. Then do the same with the second half of the egg yolks.
- Next, pour what’s in your mixing bowl back into the saucepan and heat up the new mixture on low heat for about 15-20 minutes. You should begin to see a custard form, thickening as it heats. But, remember to stir it continually with your wooden spoon, as it’ll keep larger chunks of cooked egg from forming. Small clumping will occur and that is normal. When you begin to see the mixture coat the back of the spoon, you can remove it from the heat.
- Now, take your fine mesh colander in one hand, and pour the hot mixture into the colander over the small or medium mixing bowl you used before. (Some might prefer to use a completely different bowl altogether as this was the bowl that had the raw egg yolks in it. I just use the same bowl, since the mixture we just took off the stove will be hot.) You may need to stir what’s in the colander to move it through the mesh. Then, you can either eat what you have in the colander (it just tastes like custard curd) or throw it out.
- Then, take that large mixing bowl or other wide bowl you’re using for your ice bath, and add ice cubes to it so it’s about half full.
- Next, stir in your almond or other nut milk to your ice cream mix. It’ll help cool down the hot mixture.
- Now you can take your mixing bowl with the custard ice cream mixture and place it in the ice bath for about 15-20 minutes until it feels cold to the touch. You may also store your custard mixture in the refrigerator for one hour or overnight so that it thickens even more and is even colder when adding to your ice cream maker’s freezer bowl.
- Then, taste the mixture. If it isn’t sweet enough, you can add more of one of your sweeteners. The packets of Stevita may blend in easier to a cold liquid. I typically like to use a blend of sweeteners when using erythritol because that sweetener alone tends to create a cold feeling (or aftertaste) in the mouth when you begin using too much of it in proportion to your other ingredients.
If you’re not fond of the taste of custard, you can add about 1/4 cup more of the almond or other high-fat milk alternative. As you start to add more milk, keep in mind you are essentially adding more water to your ice cream mix, which can more easily create ice crystals in your ice cream. Ice crystals aren’t necessarily a horrible thing, they just make an icier ice cream. One other note: As you add more milk alternative and lose the custard flavor, you’ll likely need to add about 1/2 teaspoon or more vanilla extract for more flavor. - Now, we can finally pour the mixture into our ice cream maker! Ours tends to beep in increments when you may choose to remove the ice cream from the freezer bowl, but when using this custard-style ice cream your ice cream will thicken faster, probably in 20-30 minutes, when it’s ready to serve.
- When it’s done, serve and remember to store up any leftover ice cream in your ice cream container right away. It’ll help keep more of those ice crystals from forming. I hope you enjoy your ice cream!
Notes
- Whenever possible, I recommend using clean, organic ingredients.
Did you make this recipe?
Tag @ketoliciouseats on Instagram and hashtag it #ketoliciouseats
Like this recipe?
Follow us @ketoliciouseats on Pinterest
Did you make this recipe?
Follow us on Facebook
